Wednesday, January 2, 2013

Year End Review


There is nothing like the fear of failing to light a fire under your butt. While I didn’t get everything done I wanted to, I am pretty proud of myself for the things I did. In the past four days, I finished the “easy” projects that I had been putting off.
I got shelves put up in my bathroom.
Before
After

I refinished my chandelier in the foyer. When I bought it, it was the lovely 80s brass. I painted it a golden color, but it was still too brassy for me. Now it’s a deep bronze. Not only does it just look better, but it matched the chandelier in the adjoining room better.
Before
After

I have a great kitchen, but there was no place to put the trash can. I had thought about cutting out a drawer and doing the cutting board over the trash (which I might still do) but for now, I installed a slide out trash can. My friends hate me for all the storage space I have in my pantry/kitchen, I still have empty cabinets.
Before
After

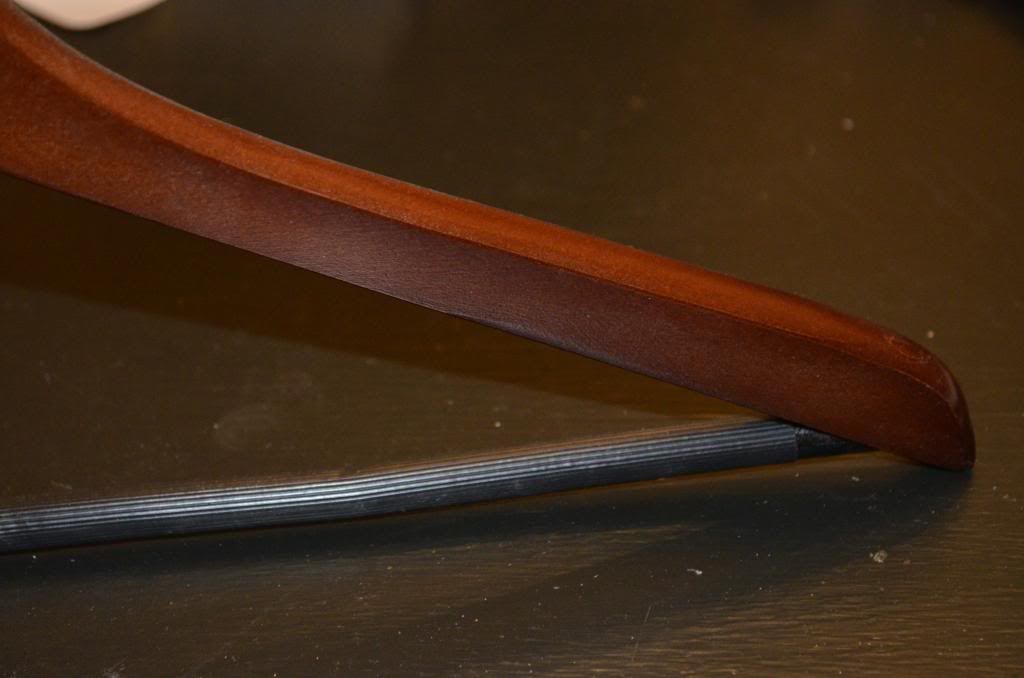
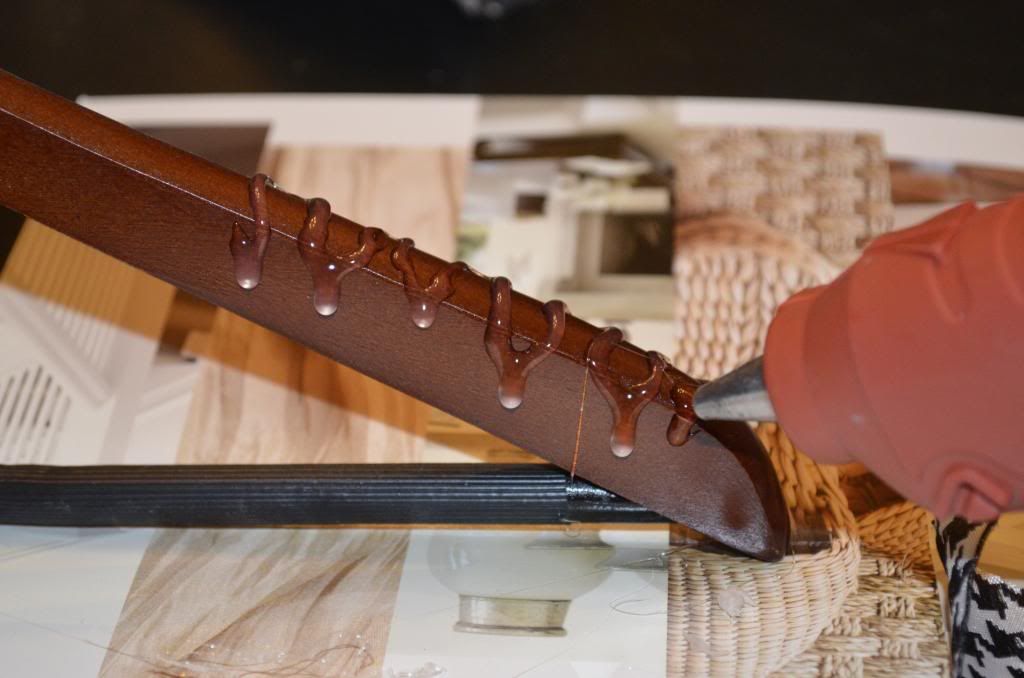
I started to refinish my breakfast table, but that’s a several day project. It’s almost done, I’ll post how I did it when I finish.
Before
So far.....

I bought doors to go on the laundry room, but I’m waiting on the hardware to come in to hang them. I still have to decide how I’m going to finish them. Oh, and I’ll also be making stained glass panels to go in them.

I have finally found the fabric to reupholster the couch in, now to get the fabric and make the cover.

I printed 101 pictured from my European trip about 5 years ago. My brother got me this great album, so it was about time I filled it. Only problem with that, now I HAVE to go back!!!


I also lined the laundry room cabinets, hung a basic towel rack (still plan on changing), and am 75% done with the Peacock Stipple. 

All in all, I’m pretty happy that I got most everything done on my list. Just because the year has ended, doesn't mean I’m going to stop working on the list. After all, my list is constantly growing!!

Friday, December 28, 2012

"Just The Right Shoe" Risers


A long time ago I started a collection of these little shoes call “Just The Right Show” by Raine. As you can imagine, it soon became an obsession! I got them for birthdays, holidays, basically any special occasion. Then came eBay came along, and talk about going overboard. I think I bought 25 of them in one day. Hey, they were only about $1.00 each.

I had these little beauties sitting all around the house. If they matched the décor, that’s where they went. Fast Forward five years and my new house has these great built-ins, so I decided that I needed to group them all together. The only problem there was you can’t see them all. That’s when I decided I needed to build little risers for them. They are little pieces of art, and they deserve to be shown off properly.


The first thing was to measure the space, no point in building something that doesn't fit, right? Because the space isn't that deep, I could only go up three rungs. Since I don’t PLAN on buying anymore shoes, this should be enough. I took the total depth of the shelf and divided it by three to get even spacing.

I used the shelf as the first rung, which was simple enough. Then I started the building. I cut four pieces of plywood of equal width and length. Since these shoes don’t weigh a whole bunch, I didn’t need to use heavy duty wood or nails.

I didn’t want to show the raw edge of the wood, so I put the horizontal piece behind the vertical piece and nailed it in that way. I think it gives it a better look than seeing the multiple layers plywood has.

For the second shelf, I put the horizontal piece on top of the vertical; it faces the back, so there’s no need to worry about the edge. Also, this makes up for the ¾” you lose when the horizontal piece is lower than the vertical piece. Add the final piece and you’re done with that.

For extra support, I cut a couple of support pieces to go under the risers. I wanted to make sure that they fit tight within the shelf so these pieces will be hidden under the risers. Again, this gives it a built-in look.

I secured these with the same nails, and Voila! You’re done.

I have been seeing a bunch of pictures in design books that have been coloring the inside of the shelves/bookcases with an accent color. That’s what I did here.

What do y’all think? I’m pretty happy with it.

Before


After


Now once I figure out what colors I'm going to do in this room (reupholster couch), I plan on painting the inside of the cabinet a color to match.

Custom Bulletin Board


In an effort to be better organized (hence The Projects Project) I needed a bulletin board, but I had NO idea how expensive they can be. Aside from the price, I never really saw any I really liked. Then one day while at Target, I found this roll of cork for $2.00 sitting next to the $22 bulletin boards. No brainer, right?

I took the roll of cork and a piece of plywood, some ribbon, and then in no time, I had a bulletin board that fit my décor.


All you need is the roll of cork, plywood, utility knife, spray adhesive, glue gun, and picture hangers.

For some extra padding, I put a piece of cardboard behind the cork.

Step 1: Measure and cut the cardboard to the size of the plywood (not the cork). Apply spray adhesive to both the cardboard and plywood. Simply line them up and press down.


Step 2: Apply the spray adhesive to the cork (mine was rolled tights, so I had to let it sit overnight unrolled under some heavy books).


Step 3: Center the cork over the cardboard covered plywood and press down firmly.

Step 4: I bought some ribbon that I liked, and with a little hot glue, I applied it to the edge to cover the raw pieces of the cardboard and wood. Besides, it makes it look nicer.


Step 5: Attach the hangers. I chose these for no particular reason, they were just what I had.


Step 6: Hang and enjoy!


Stuff Embroidered Pillows


Twelve years ago, I spent three months with my family in Pakistan. Some of my best memories of my AMMMMMMAZING grandmother were from then. Since there isn't much to do there, I learned many of my craft during this time. One of the things my Aunt taught me was embroidery. One of the many things I made was this trio of pillows. I had no idea what I’d ever do with them, but I made them anyhow.

Well, for the last 12 years, they have been sitting in a bag waiting to be stuffed. I finally got the batting I needed, and overnight, I FINALLY had pillows. Still don’t know where they will go, but at least they are done!


Non-Slip Hangers


When I moved into my new house (18 months ago) I decided that I wanted to have a “grown up” closet. That meant, matching wooden hangers. I saw these Dark Wood Hangers at Target. They were the best price, but only one thing, now grip. I have some shirts that have a wide neck, or one-shoulder so I have to use the little annoying strap to hang them with. Well with no traction, they would all just slip off.


That’s when I decided to get a little creative. Hot Glue! Come on, now is there really anything a little hot glue can’t fix? SO simple, and works like a charm!!


Simply drizzle glue over the hanger, let dry overnight, and VOILA! nonslip hangers!!!


Before, barely hanging on......


After, safe and secure!!


Even the one-shoulder number is hanging perfectly!!

AS WITH ALL HOT GLUE PROJECTS, PLEASE BE CAREFULL. IT'S CALLED HOT GLUE FOR A REASON!


Thursday, August 16, 2012

Remove Grease from Green Dress

I bought this dress a couple of years back, and I absolutely LOVE it. It is one of my favorite things to wear, especially in the summer when it is so ridiculously hot out. I wore it on my 35th birthday, and somehow I ended up with grease all over the bottom of the dress. No clue how it got there since I had already done the majority of the cooking before I put it on.

Nevertheless, I cried when it didn’t come out in the wash. My friend told me to put baking soda on it and let it soak. I tried that it didn’t work. Another friend told me to put corn starch on it, still nothing.
Then I went on the internet and saw people saying to put dish soap on it. That seemed to work the best.


I did have to do it several times, but I think it’s made a difference, don’t you?
If you have any other suggestion, please let me know, I don’t want to lose this dress.

Thursday, June 14, 2012

Custom iPad Case

Email me to Customer Order Your's Today: Customerservice@tahiradesigns.com
available for Kindle and Nook also
I have a dear friend that is obsessed, and I mean OBSESSED with zebra print. Her birthday is coming up, and I know her family is getting her an iPad. I figured this was a good time to get her something in zebra print that's not over the top. It took some trial and error, but I was able to come up with the perfect case.


 I truly hope she likes it.